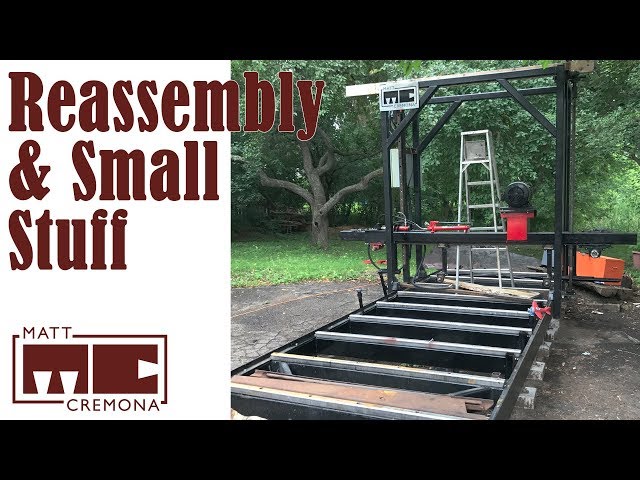
Reassembly - Building a Large Bandsaw Mill - Part 19
Hey everyone my name is Matt welcome, to my backyard and welcome back to the series I'm doing I'm filling this big band, sawmill it's, been, a while. If. This is your first time here to be a link up in the cards and down the description to all the videos that I'll bring you up to where we are right, now and speaking. Of it's been a while in the last video it, took apart basically. The entire saw head so, I can get the guards off and get to the beam so I get everything painted and I, start reassembling things, that, video took place last August, it is now the following, June the, mill has been sitting under the tarp that a whole time as I've, been putting. Off finishing, up the work on this thing so, in this, video we're, going to kind of keep going with, the theme of putting. Things back together and I'm also going to start working on some things that, I kind of glossed over and, simplified. And skipped as I, was building the mill because I was really more, interested, in getting this thing operational. So you know logs cut and out of my driveway then, making, everything as perfect or as properly, done as I had in my mind so, let's. Jump into it so. One of the first things I want to take care of is adding, the stops for the carriage so, right now there's nothing that stops the character rolling off the end of the track and what, I typically do is grab a c-clamp, it's clamps of the rail and that acts as a functional. Stop that, prevents, the carriage, from going past that point but, of course that needs to be a little more. Not. Temporarily. Permanent. So. I make some little stops to go on to the end of the track and have this piece of two, by two quarter, wall angle this, is an off cut from when I made my outdoor, fireplace, Susman, sitting around for like four years already, that's me perfect for a little stop I can cut a few pieces about. Four inches long drill, some mounting holes in there and then, mount them to the end of the rails now, reality, is you only really need for, one. Side because, if one side hasn't stops. The other side isn't going to go past it anyway I'm gonna go ahead and make for one, for each corner just. In case might give you some more options for some more things in the future I don't know what but at least they'll be tenant they're all the way and. If I need to remove them because they're in the way how I saw the ones on the other side it's like changing. I, want, to take care of these now because they have a few other things that need to get painted so, if I get this things made I can kind of put those in with the batch of stuff that's, gonna get painted they kind of consolidate. Things that hopefully save a little bit of time and effort. So, here is the first batch of painted, parts are we putting on the mill so I have these stops which I just made I also have the lower thrust, bearing supports, for the lift mechanism and, the. Bearing caps the, motor electrical, box and this, little just there post that holds the adjustment, arm for the blade. Guides so, I'm gonna start by installing a little, stops here so, I can finally remove my temporary, /, permanent, stop which, is the C clamp it's been out here for like 18, months and install. The actual, stop. Onto. The, track here. So. Now there is a permanent stop here so as the carriage comes down the track the, upright will contact this stop and I won't be able to go past the end of the track thereby. You know falling, off of the whole track now, this. Doesn't really get used that often this is more like an emergency, stops so no real reason to put any kind of padding on here anything really. Should be contacting, this during. Normal operation, as you're coming back and forth on the mill and last something, gets away from you and this is more like an emergency stop so, something. Bad doesn't, end up happening so the next thing they go back on is this adjustment, support post this, is gonna get bolted on to the beam and that's actually gonna hold the adjustment, post down. Here which operates, the blade guide on the, idle side so, this, used to be welded to the beam the life of this whole thing apart I did disconnect, this thing and I, did drill holes through it before I, actually cut it free that way things will stay aligned after, the hole bolting on process, so I have some pilot holes in the beam already so, I'll have to do now is just enlarge them to the right size and tap, them for the bolts. So. We need to start working on getting the lift mechanism back, installed, and that's, gonna start off with installing, these bearing, plates on the bottom of those little platforms, down there where that kind, of temporary, support is right now, but. It's gonna be kind of hard to actually, tap and drill the holes with the guards there so, I wanted to remove the guards but, before I remove the guards, I want, to replace these little latches that I installed last.
Time And as you can see they do not hold up very well to the forces, that I need to be there to keep these doors onto, the, actual guard assembly so, I want to replace these with something a little more durable, so. I got these, all-weather. Kind of rubber draw. Straps which. Should be able to provide a lot more clamping. Force to the guard doors keep, those things in place and. Yeah. I'm not too worried about the hooks he's only like a couple, bucks maybe a dollar to a piece he's, a little more than me like seven dollars a piece but. Should. Provide a much better result than what. I have right now. So. These straps are a lot better than those latches I had on there previously so. I'm pretty happy about that so next, I want to start working towards, getting this whole lift mechanism back in there and to make the whole process easier I'm, going to strip off all of the guards and while I'm taking things off of here I'm gonna pull off these. PV. And can't talk holders that, way I have those things kind of in the pile for the things they're gonna get painted for, the next round of things they're, gonna be painted. Whatever. That I remember. So. Now I'm ready estar working towards getting the whole lift mechanism reinstalled. Which starts off by installing these bearing, holders at the bottom there onto those platforms were, those. Posts, that are currently supporting, the beam are, sitting, so, before I can get, to install these. Bearing. Holder plate, support, things, whatever. You want to call these things thrust, bearing support, plates, something, like that I have, to remove the. Temporary posts, so, I have to find, a different way to support, this beam temporarily. It's before I move these last year I did Center punch the hole locations so I can get this thing back into exactly, the same position to, make sure those lifting. Rods are aligned so now I have to do just find the punch holes from, like. Months. And months ago, and, then. Drill and tap. Those. Holes. So. This side looks like he's only gonna get two bolts because this, adjuster, post support is, in the ways I can't drill back to the mounting. Holes back here cuz that's in the way but it doesn't really matter because these. Bolts is kind of keep, the bearing. Plate kind of in place once. There is weight on top of it from the saw head sitting on it it doesn't go anywhere I just. Have to resist any kind of torque or anything because, the bearings take care of that it's, really just getting bolted, here so that kind, of as you're putting this thing together this. Play doesn't kind of walk around on you. And. While I'm over here also reattached, the nut retainers, which, hold the Acme nuts which are part of the lift system. And. Keeps looking like it's gonna rain again today, it was raining this morning and then, it's been raining on and off all afternoon but I kind of want to get started on this and of course it's. A plane flying overhead now but anyway. So. This morning I took the, step. Shafts, and the, ackee rods and got the keyways, cut into them so a big THANK YOU to Carson, for helping me out with that he used his mill to cut, all those key ways for me so. We cut the key ways in both ends of the Acme rod to made up with those couplers don't. To worry about those set, screws trying to grab and slip anymore and they also replaced, the key ways that I had ground with, an angle grinder into, the step shaft so I have actual, proper. Fitting key ways in those, as well so again, big, Thank You Carson I really appreciate, you. Having me out to the shop so I have. All the parts I need now I can start reassembling the. Lift system so first thing I go in are the bearings. Sit. Into the bearing holders there and then I have this cover that I made which, would go on top of there and hope to protect the bearings and keep them free of sawdust, now one thing that I was planning, on doing which it's. Not gonna work out anymore is I did. Pick up some bellows, for, the Acme rods to keep them clean but the. Inner. Diameter on these guys are, too. Small to fit around the. Couplers, apparently. So, I have. To order some new ones and, I don't really feel like waiting for new, ones to come in to keep going with this so. I'll have to take this apart and. Redo. That at some point, but. That's alright, I'll. Just have to wash these things a little bit better because the bellows is going to help to keep everything super. Clean. So, to, keep, sadhus. And stuff out of the bearings let's, go we'll ring here which will slide on to. The step shaft and now help kind of seal things up. Against. That, cover. Hey. Can. You slip down there like that and that should help to keep a little bit more on the clean side. So. Now I can move on to the top section of the lifting columns and one of the things I need to do here is actually cut these shafts down to their final lengths when, I originally installed these I just left them long just in case I want to do something above, the carriage system but, now that I have the designs finalized.
I Know that I can trim them down to their actual, final length which is to be flush or roughly, flush with the top of the carriage just, enough material, to pass through the bearing at, the very top of the carriage. And. Another thing I'm going to do is weld a nut to, the top side of the, drive. Side lift I previously. Only have one of these on one side but, having a nut, you can grab with a wrench, or with a socket on. Both sides will make aligning, the beam a lot easier because you'll be able to operate both, sides independently. Before linking, it with the chain. So. Here is the driven side the lift mechanism so, it has the two sprockets one, that links it to the other side and the one that links it to the motor, which actually does all of the driving force to actually lift the, saw head up and down and, one thing I'm going to do over here is push out the size of the drive sprocket so. On the motor right now I have a 13-2, sprocket, and then I used to have this 33. Tooth sprocket on here. Which gave me way. More reduction. That actually needed the motor, technically. Has enough torque to drive it out of one to one so, I'm going to swap these 33, tooth sprocket for a 22, to Brock it which will speed up the travel the lift mechanism and, still, give the motor a bit of a mechanical advantage so. There's not the work nearly, as hard. So. I take care of the lift mechanism and, I think the last thing I want to take care of in this video has, to do with the base I want to take care of that now before, I start adding weight to the saw head so, the, issue with the base is two things is I'm gonna take, care of and solve, here. So, first off the saw itself, is too close to my shed that's, just happened to be how, this whole setup, works because when I built this mill this, was all logs right here so I didn't have anywhere to go except. Right here it's, too close to the shed right now so if I had the saw head back. To where I am right now I can only raise the head about I think three feet before, contacts. The. Fascia. Board on this shed there which is something that I totally, forgot about one time I had, the saw had parked underneath there I start, lifting the saw. Head up and saw, had contacted. The fascia on the shed and. Luckily. I had noticed six I hear all the cracking, creaking there's. An airplane flying overhead again, but. I ran over there and turn it off quick but that something's been on my mind for a long time so. I want to reposition the saw a little bit is gonna get me a better approach angle to coming. Down the driveway I'll be a little more in line with the trailer as it comes down the driveway. The. Other thing is my, idea. On these, leveling feet, was kind of flawed I guess, to begin with so. I used, to have the bolts up on these little stainless steel pads which would help distribute, the weight of the saw on to my asphalt, driveway, and. I thought that having the bolt heads on top of here would be kind of nice because if I need to change the the, leveling feet at all you. Know steel on a steel would turn a lot easier than me trying to turn a whole, solid piece into, the ground, and lift up that way so, low friction that was a good thing with the leveling part bad, thing with that is that low friction if any, load is applied or any kind of pull force is applied to the saw bed. At all like as I am when I'm pulling logs on. To the mill it's. Really easy to have the whole bed, just slide and what, ended up happening a lot of times these things slide, and fall, off fizzle pads and land. In the driveway and then, start sinking. So, that's why I added these concrete, blocks just in case these these, both did, slide, off they, wouldn't fall through my driveway and it also gave me a little more height because. I figured, if I'm gonna be adding the hydraulic, stuff to this I'm gonna need a little more ground. Clearance than I had previously and. Just being a little bit higher meant that the last boards off the mill you weren't bending over nearly as far which.
Is Kind, of a nice thing so, my plan for the living feet is gonna go something like this all, of the discs are gonna get a hole drilled in them and then a pin installed that's, gonna go into a hole in the bottom or I guess the top of the bolt the bottom of the foot or whatever that's, going to lock the two pieces together so this slide is one piece like a little more friction up against weirdest thing is sitting on which. Is going to be kind of nice I'm, also going to drill the hole in the bolt a little oversized, so that way I can't, take up any misalignment, if the. Mound. The ground isn't totally flat or whatever so there's a little bit of play, side-to-side this hole isn't deep enough at the moment but. While I move, the whole bed over I'll have the whole thing off the ground a little bit now I'm going to take all the bolts out, sequentially. Drill the holes and then get the new ones installed so the good time for that and, in case you're wondering why I don't have my blocks turns long, wise that's, because it's a lot easier to clean out between all, of the bunks when there isn't some stuff in the way I, always get the comment about dust, collection and the stuff coming the shoot why. I don't put. Down a bag or collect it or do anything with that the. Truth is the stuff that comes and, makes it out of the chute as the easiest stuff to clean up guys, grab a snow shovel and I just felt my wheelbarrow with that stuff I'm. Gonna be out here anyway the longest, and the most ridiculous, amount of time spent out here doing, cleanup after milling is getting rid of all the stuff that ends, up underneath, the bed so. The blocks oriented, the way they are right now kind of across the width of the bed dust so allows me enough space between each block to, kind of slip a shovel in there and get up any kind of sawdust, or any bark or any chips that might be between. All, the crossmembers, in the bed that's. Honestly the most amount of work there is when as far as cleanup goes the stuff that comes out of the chute you, know five minutes it's all gone then, you spend a half, hour out here shoveling stuff up from between all the bunks. Stall. I'm going to end this video here I still have two more leveling, feet to modify, but, I'm not super worried about that I can take care of those pretty. Much whenever, I made a lot of progress in this one a lot of things they're all back together and speaking. Of kind of back together everything. That, I removed, as part of the last video when I went through and painted everything is now, pretty. Much back on there and now, it's all about moving forward so, next time we'll take a look at the whole top section of the lift mechanism well, do all of the chain routing, and the tension. Nerves for the chains and finish. Up everything up there to, complete the whole lift, system, so, all that will come together next. Time so. Thank. You as always for watching I greatly appreciate, if any questions on the sawmill or anything back in the shop please, feel free to leave me a comment supposed to be happy answer the questions you might have until. Next time. Happy. Woodworking.
2018-07-14