Primitive Technology Re-smelting previously made iron
Swollen creek in the wet season. Hut in the wet season. The side wall keeps the rain from splashing in Even so, the weather makes the interior damp, making fire making difficult.
Bricks are taken to the hut to increase the height of the side wall. Mud is collected to form the mortar for the bricks. Provided the wall doesn't get direct rain, the mud mortar will not dissolve. This method of building is faster than building a solid mud wall as the builder doesn't have to wait for each layer to dry before adding new ones. While wet, the wall is still unstable The rain continues to fall for many days non-stop After a while though, the wall has dried and stiffened. With the drier weather other projects can begin. Pieces of iron from previous smelts.
It consists of flat chunks of decarburised iron from forging experiments as well as some fresh cast iron prills from recent smelts. Collecting bark fibre to make rope for the drive mechanism of the forge blower. Soaking fibre in water so it will ret. Retting is the process of the connective material between the fibres rotting away so it is easier to strip apart. The fibre can then be made into rope by twisting it together. Each strand is twisted individually one way, while simultaneously being twisted together the opposite way. Finished rope Assembling the blower.
This time I'll be testing out the new journal bearings (holes that go right through the wooden stakes) to hold the rotor in place. The last ones were thrust bearings (shallow pits carved into the stakes). The rotor kept coming out during use causing lots of issues during smelts. This new set up should be more stable now.
Clay is used to seal shut the lid on the housing, making it air tight. Testing the blower with a wood fire. The recent development of a one way spinning blower has increased airflow while decreasing labour and saved rope wearing out.
Eucalyptus timber Breaking wood into smaller pieces for charcoal. Wood stored inside to keep it dry. Stacking the wood for a charcoal mound inside. It rains so much right now that charcoal making needs to be done in a shelter.
A pyre is built by alternating wood in layers. Then, wood is laid onto the sides of the pile at an angle, keeping it stable by stopping logs rolling off. This also gives the mound a cone shape which is easier to coat in mud. Mud from the clearing is collected to coat the mound. Slapping mud onto the mound starting at the base and then going up.
A hole is left in the top and 8 more holes are made around the base for airflow. Fire by friction. The mound is lit from the top of the mound and burns back down towards the air entries at the base, converting the wood to charcoal. Cracks are sealed with mud as they form. A heavy shower shows why the mound was built under cover. When fire reaches the air entries they are blocked with mud.
When the last air entry is closed, the air exit at the top is then closed also. Water is added to help cool the mound. The next day the mound is broken open to retrieve the charcoal. It's a smaller than expected yield due to some over burning. But it's fairly good quality and will help top up the current supply. It is thrown into a charcoal bay made of bricks next to the furnace.
Candle nut tree. Leaves look like this. A candle nut. The candle nut is extremely high in oil. It is also has a cyanide like poison if eaten raw.
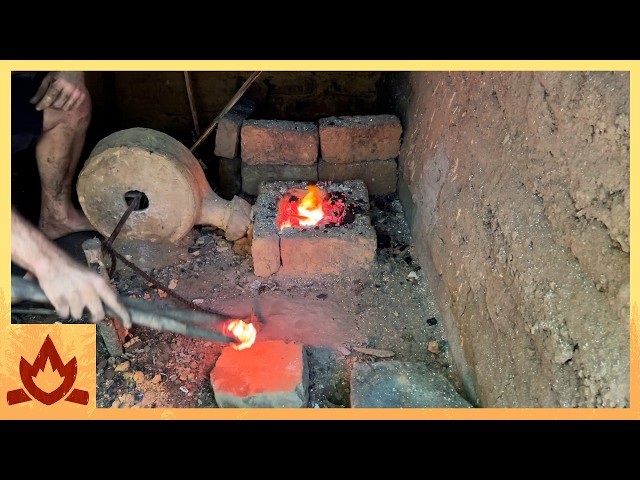
But I'm not going to eat it today, instead I'll use it to oil the bearings of the blower. This will lower friction and make the blower work slightly better (less squeaky too). Now ready to re-smelt the old iron and hopefully consolidate it for forging. Wood for furnace preheat, charcoal and scrap iron. Preheat furnace for one hour.
Fill furnace to top with charcoal. Add all the iron in one charge. Cover with charcoal. Operate blower until it's burnt down to tuyere level. 30 minutes later. No mass apparent, too hot to get out.
Later, when cool, a few masses are retreived. The masses are hammered to test malleability. The iron is a bit more malleable. I think that the outer layer contains less carbon and is softer, while the inside is high carbon and remains brittle.
This bit is probably low carbon as it can be cold forged flat while other pieces break. The pieces seem to vary widely in carbon content. I'm going to break the charcoal into smaller pieces (2.5 cm) for the next smelt to make more carbon monoxide.
I'll be adding ore with the iron this time, and carbon monoxide helps reduce the ore to iron. The ore is roasted iron bacteria. The scrap iron will be added in the middle of the smelt between the charges of ore.
One hour preheat with wood. Furnace filled with charcoal. First charge of ore (2 single handfuls). 3 double handfuls of charcoal and 2 singles handfuls of ore.
3 double handfuls of charcoal and 2 singles handfuls of ore. 3 double handfuls of charcoal and all of the scrap iron. 3 double handfuls of charcoal and 2 singles handfuls of ore. 3 double handfuls of charcoal and 2 singles handfuls of ore. 3 double handfuls of charcoal and 2 singles handfuls of ore. The preheat and smelt took 2 hours and 15 minutes all up.
It rained for much of the smelt but the little workshop protected the project. The bloom is retrieved when cooler. It is a mass that forms below and Infront of the tuyere. Bloom mass. Recently the blooms have formed a slag trail that drains below the bloom seemingly due to the higher airflow of the new blower set up. Some iron prills are visible on top, cast iron drops from the fresh ore.
The bloom is crushed and iron pieces removed. The weak slag crushes easily while the strong iron resists breaking and is picked out by hand. The crushed slag is kept aside to get more iron out later during the panning step. If it doesn't crush easily, it's iron. These big pieces must be the iron charged in the middle of the smelt.
I think the big bits are re-cycled iron of low carbon content and the smaller bits are high carbon new iron from the ore. Panning the slag to get more iron. The heavier iron remains in the pan while the lighter slag washes away. Iron on the left, slag on the right.
Converting the furnace to a forge by removing 2 layers of bricks. The tuyere is melted from multiple smelts and will be replaced. Mud wall and replacement tuyere. Filling the slag pit with a brick and ashes. A forge only needs to be shallow for most purposes. Iron, charcoal and forge. Short preheat with wood.
Fill forge with charcoal Forge heated. All iron added when forge is hot Covered with charcoal to keep heat in. Lump of iron pulled out and hammered. Getting more pieces out. The iron formed separate pieces that get lost in the coals. Some hammer flat a little but some are still brittle.
I'm going to try putting the iron in a crucible lined with iron ore. In theory the ore should decarburise the high carbon iron while make some more metal from the iron oxide in the process. Puddling furnaces were lined with iron ore for this very purpose during the industrial revolution. A cap of ore holds the iron in the crucible. The crucible is placed in the forge. Using a stick to press the iron together in the crucible. The white hot crucible is repositioned in front of the tuyere. Pressing the iron down.
The crucible is pulled out and hammered. Unfortunately it seems that the iron metal has re-oxidised into the ore almost completely. Only two small pieces remain.
Next time I'll try just an ordinary crucible (no ore in it) to form an ingot and slowly heat and hammer it till the carbon is removed from it. But now I have no charcoal left marking the end of this project.
2025-04-04