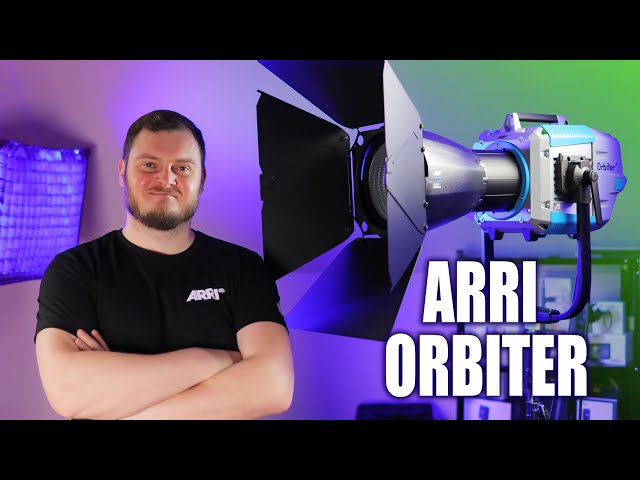
ARRI ORBITER - НА ПИКЕ ТЕХНОЛОГИЙ ПОЛНЫЙ ОБЗОР ПРИБОРА И АКСЕССУАРОВ ENG SUBS
Hello everyone, dear friends, today I want to tell you about the coolest, most technologically advanced, most modern lighting device from the Arri company, which is called the Orbiter. In fact, his is not just some new product in the Arri line, this is perhaps the coolest and most multifunctional fixture hat you can buy right now. But actually, for the Arri company the Orbiter has become a kind of rethinking of its lighting devices and a lot of new technologies are used here: from the new attachment of optics to the new operating system.
And today I will make the most detailed analysis of this fixture. I will show how it works with different optics and these are almost all optics that are currently on sale. Since the device is modular, at the end of this video there will also be a separate block, where I will show all optics with vendor codes and, accordingly, with delivery kits.
I will tell you about my impression of working with this light, but most importantly, we will measure its photometry using a professional spectrometer Sekonic C800. And believe me, you will not find such a detailed and useful review not only on the Russian-language Youtube but you also will not find it on Youtube at all, so I think it at least deserves your like. And I took this light as well as all available optics for review at the FilmexPro company. They are the exclusive distributor of the Arri company in Ukraine, so if you need some equipment with the Arri logo flaunting on it, then of course first stop by them in the first place.
The link will be in the description. First, we should start with the construction. It is a monoblock, It has two carrying handles on the top and bottom. And also they used a completely new optics mount here - QLM, respectively, Quick Lighting Mount. And unlike the usual attachment of the type of the bowens, there is a contact group here, which means this device recognizes and understands which optic is installed on it. And also you need to know that if you remove the optic then
the device will not work. So for the device to work, you must install an optic with a QLM mount on it. And accordingly, as soon as we set this or some other optic back, the fixture automatically resumes its work with the same settings. Almost in all advertising materials, Arri Orbiter is shown precisely with Open Face optics - so they are called. Now on the device, I have a 60 degrees optic installed, this is for 30 degrees optic and this monster is for 15 degrees. And accordingly, it is for these three Open Face optics that the Arri company shows photometry, in particular the level of illumination, on its website.
This device weighs about 12 kilograms itself, which you will agree is a lot. And while I was unloading the boxes with accessories, Ketty had already practiced with it and used it as a gymnastic equipment. As for the installation of this device, there are no problems with it. But in order to extract it, you need to get a little tricky, as in order to remove it from the stand you have to simultaneously hold these two connectors with both hands and at the same time pull it up. And since the device is quite heavy, I managed to do it, roughly speaking, from the shoulder. That means, you lift it with your shoulder and, accordingly, hold
this whole construction with your hands. What alerted me personally is that this mount is made of plastic on both sides. It seems to me that for such a heavy device, also with optics that also weigh a lot, it could be made of metal. But since this all is fixed with three bolts,
I think if there are any problems with this fastener - Arri will release exactly the same but already a metal one. In addition to the already produced optics with QLM mount, there is also a Lemo connector for future modifiers that will require external power to work. If you look at the device from above, you won't see here anything except a massive radiator and a fan located below. The fan blows air from the bottom to the top. This is
logical because the warm air rises anyway, so the fan works in the direction of natural convection. This device itself is waterproof but at the same time, its connectors, including the DMX connectors, which we will talk about a little later, are not waterproof. As I understood, the Arri company declares its weather resistance to raindrops at an angle of 75 degrees and more. If the angle is less than 75 degrees, which is a kind of slanting rain, or
if your device is installed with an inclination, then you need to use a special water protective cover. As for the fan noise, I didn't experience any discomfort from its performance at all. The cooler here is quite large geometrically and doesn't work at high speeds even at the maximum power of the device. Therefore, it can be safely used for filming interviews too. In the basic configuration, the device is supplied with such legs on the bottom, but if you wish, you can buy an additional accessory like this and install it on such a pedestal. But what is most interesting not in the device kit nor in this pedestal kit there is no hex key or any Torx key so that you could unscrew the connector of these legs. Therefore, you will have to purchase the tool necessary for this manipulation separately. Arri Orbiter can perform at temperatures from
minus 20 degrees Celsius to plus 45, so for most locations, this will be more than enough. Now let's go over the interfaces. There are more of them here than, for example, on the same Sky Panels. Firstly, we have a slot for SD cards here. SD card allows you to update the firmware, and you can also write metadata to it. "What's metadata?" you'll ask me. In fact, Arri Orbiter has a built-in accelerometer and a magnetometer. That means this device understands its real position in space and records all this metadata in case you need it when creating some kind of special effects or perhaps for compositing. There is also a Type-C port
for connecting a computer, as well as two full-size USB connectors, for example, if you want to use some additional equipment such as Wi-Fi Dongles. Of course, there is a standard DMX in DMX out, LAN ports for input and output, but also what is very nice - the power supply unit is built directly into the case. And it is very nice that this did not result in increased noise of the fan. As you can see, in the basic configuration the Orbiter is already equipped with a wireless module, so if you already have the current infrastructure, then Orbiter fits into it without any problems. In addition to operating from the AC mains, the device can operate on external batteries too. Here we have a special XLR port for this. But also there is a Sync port output for cameras so that the effects that it has since this is RGB light (and we will surely talk about this later) so that these effects are maximally combined with the frame rate on your camera. Well, now
let's talk about the most interesting - about the light technologies that are used in this device. And in fact, this is probably the most revolutionary and the Arri company has been developing this Led matrix for a long time. This is RGB light so it can shine in any color while its reproducible color space is close to Rec. 2020 - it's around 90%. And to achieve this effect, a fundamentally new matrix is applied here. It is called Arri SPECTRA and consists of 6 LEDs, but none of the LEDs is white. If you have worked with Arri SkyPanels, you know that there is RGBW technology, already outdated at the moment, is used there.
More modern panels or just other RGB devices as monoblocks use RGBWW technology where we have two white LEDs. While here we have six LEDs among which there is no white at all. If we are talking about the CCT operating mode - the color temperature here varies from 2000K to 20000K. And when the Arri company itself talks about its SPECTRA technology, first of all, it focuses on the perfect render of skin tone. And right now on your screens, you can clearly see the difference in the quality of the spectrum on the Arri SkyPanel (I took these measurements about six months ago for another review) and Arri Orbiter. And you see that the spectrum differs
dramatically like there is no such crazy flop as on the Sky Panel. But as for the output light power, it is 400 Watts for this Led matrix, while the device itself consumes half a kilowatt - 500 Watts. If we are talking here about the equivalent output power, then this is about two kilowatts of tungsten light. As you can see, we have a diffusing lens in front of the matrix itself.
But what is also very good, the light power can be adjusted from 0 to 100% so that you can set even 0,1% power. Now, let me demonstrate it to you. We go to CCT and now I set the power to 0,0% and here is 0,1%. But now let's raise our power to 100%. I think now
you don't see absolutely anything. And we return again but let's use our standard 3% brightness. And I turned the device away slightly because I'm shooting with anamorphic lens and of course you will have horizontal reflections. Also, everyone knows that over the long service life, LEDs tend to degrade and lose their original characteristics. In simple terms, the quality of light worsens. For this LED matrix Arri itself gives a predicted operating time of 50,000 hours. And over this entire period,
the quality of its characteristics should not deviate by more than five percent in any direction. Now let's talk about a new control system called LiOS - Lightning OS. Well, almost the same as iOS but with the letter L in front. The control processor itself is
four times faster here than the one in SkyPanels, and at the same time now you can save just a huge number of different settings and presets. You can attach this control unit directly to the back of the device. It is being attached there with magnets which is very reliable. Also if you buy such an additional cable which by the way goes in two different lengths, then you can use it as a remote unit. And what is especially nice: since a magnet is located here, in addition to attaching it to the back of the device, you can also attach it to any steel rack. At the same time, the control unit itself is put in such a rubber case so it is very pleasant to hold it in your hands, especially in the cold. And by the way, it has its own light sensor so it can automatically adjust the brightness. But honestly, when I worked with it in the dark,
it made the picture very dark, so I turned it off and adjusted the brightness manually. The control unit has very high responsiveness. I really like it very much, but at the same time there is one feature here: you see how cool these icons are, they are large and purely intuitive, despite the fact that I have been using this device for 2 weeks now, I still have a desire to use them as sensory. But unfortunately, there is nothing sensory here. This is confusing as in fact, as I said, even after 2 weeks of usage at certain moments I still have impulses to press the screen but nothing happens. Now let me show the main modes of the device operation.
The first is the CCT: here we can choose the intensity of our lighting. Also in the settings, we surely can set how exactly the smoothness will be regulated: for instance exponentially or by the linear response. Shortly saying this all, of course, can be regulated. Now, look. In order to go into the color temperature adjustment mode, for example, you need to press this button here. So the logic works like this: all these signs
in the bottom row correspond to these buttons. So for example, if we want to set the light temperature, we need to press the equivalent of this CCT inscription here. We clicked it so now we can change the color temperature. Also, there are quick settings here. For example 3200K: for this, we just need to press and for a long time hold the corresponding button. Or 5600K, or 6500K. But we can also manually add or subtract for example 100K: for this, we click here. And, accordingly, the Done button:
if we click here we will exit this mode. In the same way, the ratio of green magenta: we need to click this button here and we already can make the changes we need. We can also exit it by clicking on this joystick. We figured out the first mode of operation, now let's move to the second one - HSI, but here everything is simple. Again here is the intensity of the glow and the angle of our color wheel. Everything is simple here: the same way, there are fast settings and there is also a point for saturation.
But I think the logic of the device's operation is clear to you, so I will not focus on exactly controlling further - I will just show you what we have here. There is a coordinate mode, there is also such a mode where you can manually set what levels you need according to different channels. This really is rather a specific thing, maybe will come in handy for someone. Here we also have a set of all kinds of gel filters: there is a great number of them and I think after a while they may even add some more. We also have a set of ready-made presets, for example, for a tungsten lamp
or for a halogen lamp. But here I think you can figure it out without any problems. Also, one more point worthy of attention is the effects. Here, as usual, we have classical candle effects. I tried it and indeed at Arri's it all works better than anywhere else on other lamps. It all works significantly differently: like with smoother fading, no some kinds of flicker arising. So now I'm just going through all sorts of effects for you, I think you will understand what do we have there. Well, of course, we all love Cop Car and here we surely can choose different values and the combinations it will blink in.
Well, now I want to show you a mode that will really get you shocked. See, this device has its own sensor for the color temperature of the surrounding space. So it has a сolorimeter that already built into it. And if you select the continuous mode here, the device will adjust its color temperature to the color temperature of the surrounding space in real-time.
It's just a crazy thing: for example, if you are recording an interview at sunset and your light temperature changes, the device will follow it! And to be honest, I have never seen such a function anywhere else. But now guys, let me show you how it works in practice because this is really very cool technology! Look right now the sensor is already measuring the data, which means it shows the temperature: the temperature of the device and generally in my studio is 5200 Kelvin. Meanwhile, you can calibrate the sensor for Led, for daylight. In particular, now we
use Led, therefore, for our readings to be as correct as possible, we keep it for Led. Now look, we have a continuous mode and I have such a fixture. I certainly do not vouch for its accuracy, but for example, its color temperature is 3200K. And right now I light up the sensor of our Arri Orbiter and you see that it shows us the temperature 3237K and sets the same color temperature itself! You see, right? If I remove it from here, it evaluates the ambient lighting again, adjusts accordingly to it, and sets the same color temperature. But now for the example, I want to change the color temperature to 6200 Kelvin, and in the same way I apply it to our sensor. And we see that the color temperature here is approximately in an area of six thousand, but of course, there is a certain error. And Arri Orbiter's sensor
adjusts to this temperature and sets it as written here on the screen. And this technology is really very, very cool. Friends, if you want to know where we get the music for our YouTube channel and Instagram there are no secrets in this. Right now, by the link in the description, you can go to Epidemic Sound and get a month of free access. Epidemic Sound is a huge music library and there is music just for every taste. Right now you see all the genres proposed there and you can also search what kind of music you need by emotions: epic, dark, mystical, inspiring. Also, there is a huge amount of sound effects.
Actually, everything that I have just told you is probably just one-hundredth of what you can tell about it. And personally, I use Epidemic Sound since 2016. The service works by subscription. That means you do not have to buy each song separately. You just pay a small amount of money per month. What means small? Well, for example, like two burgers, or like going to a barbershop once, I think not even in the capital. That is, as you understand, just a penny for such opportunities.
And after that without any restrictions, you can download as much music, sound effects as you want, use them in your videos, for example, on Youtube, on Instagram, Facebook, or on Twitch. By the way, for one personal plan, you can simultaneously use all these social networks, so you do not have to pay separately for Youtube, then separately for Instagram. This is all included in one personal plan. It is really very convenient and as I said, if you register right now, you will get a month for free. Many people have a question: what will happen if after this free month (how we all love, right) I’ll stop using the service as I just want to try it for free? What will happen to my videos that I have already uploaded? Will I get some strikes? No, nothing will happen.
Epidemic Sound gives a clear answer: all the music of your videos that you have already uploaded during this free period will be licensed lifetime for you. And your videos will be monetized lifetime too. But if you want to upload new videos then you will have to renew the subscription. And by the way, the subscription can be turned on and turned off at any time that is convenient for you. This is perfect for those who don't constantly upload videos to YouTube. So, for example, you filmed yourself on vacation, made a subscription for one month, uploaded all your videos, and then you don't use the service for a year, waiting for the next vacation.
And Epidemic sound also has a commercial plan. It's suitable for those who make a video for customers. Like now you have bungled a video for someone and your client has uploaded it to his YouTube channel. You just take a link and in your personal account indicate that this video is made by you. And that's it, your client is also an official user of this music, and he will monetize the videos on his YouTube channel.
This strategy will also suit those who have several YouTube channels: you can get music from one commercial plan to all your YouTube channels. Commercial plan trial is also free for a month, so the link is in the description – please register if you haven't done it yet. Now let's go over the settings. I will not go very deeply because I think that those who acquire this light for themselves will easily deal with all this. I just want to show some key aspects. Light control. Here we have a High Color Rendering mode, but at the same time, we can set it to High Output mode, which is a higher power mode. Actually,
the difference in light output power in these modes is literally a few percent, so I see no point in it at all. And therefore all our photometric measurements were carried out in the mode of maximum light quality. Here, as I said, there is an opportunity to choose how your wheel will react to its rotation and there is also a High Speed Mode. What it is? If you shoot with a frame rate of more than 200 then you need to set the High Speed Mode.
But if you shoot with lower frame rates so that your shutter doesn't go down to values lower than 1/200, then you can just use the normal mode and this function should be turned off. Most of the other settings concern remote control and integrating this device into the network. As I told you earlier, here you will not have any problems at all. As for the Display Setup, these are the settings of exactly this display. Like, as you see, here we have the ability to automatically adjust the brightness of this display. Also, there is a tribute to the traditions of modern smartphones, which means we have several themes. Accordingly the dark theme, the light theme, and Auto Switch. Well, I prefer the dark theme. And there is also an accelerometer here,
so if you turn your block over, then it should automatically change its orientation in space perfectly. And by the way, if you have set some operating mode on the device and you turn off your control unit, then the fixture continues to work in the same mode. And if you insert it back into your device then after loading exactly the same last operating mode is indicated on the screen, which is of course very good. Now let's talk about accessories. As far as I can remember Arri Orbiter was presented on IBC 2019, right? Right, 2019 which I attended. I already got completely confused with this epidemic.
And then many people were passing and watching not understanding what it was. And so for this one and a half year, a fairly large number of accessories appeared for the Orbiter. You have already seen some of them today during the review but if you want to see all of them with detailed Vendor Codes and unpacking in order to understand what is set - then there will be a separate block for this at the end of the video.
Arri Orbiter itself is supplied even without a power cord, so the power cable is a separate accessory - exactly the same as this cable with which you can connect your control unit. So various accessories are waiting for you at the very end and now let's talk about photometry, about the light quality. As I said, for the measurements we used a professional spectrometer Sekonic C800. And, in general, the results were quite expected, which is good. As I said, we carried out all the measurements in the mode of maximum light quality - in the High Color Rendering Mode. CRI and TLCI values turned out to be quite good. SSI Indexes for a temperature of 3200K turned out to be just excellent, but for D56 it was already not that excellent but still at a good level. For other color temperatures, these Indexes are not relevant at all, but we
still left them in the table for clarity. As for measuring the illumination level with different Open Face optics with different degrees, I repeat that there are 15°, 30°, 60°, then our value coincided very closely with the Arri values, which they indicate in the specifications. Thus, there is no discrepancy here, but as for the accuracy of the color temperature measuring then it could be higher in some ranges. And in the Color Wheel Mode up to 90 degrees values, we clearly see significant deviations. I think it's not a problem to fix it with the firmware - where there is a will.
Also, in this Color Wheel mode, we measured the maximum brightness of the light which in its turn is conditioned by the structure of the matrix, by the kind of applied LEDs, what are their combinations, and in what powers they shine. Therefore, according to our table, you can understand what will be the density of the fill, for example, for blue, for green, or for red. Accessories Well, guys, it's all for today. In my opinion, I told you absolutely everything you need
to know about Arri Orbiter. Subscribe to the channel if you got to this video by accident and please write in the comments if you are interested in professional reviews of professional fixtures. I understand that this device is certainly not for everyone. But it seems that for the general development it is sometimes useful to know what there is produced in the Hi-End segment. Okay, guys, that's all for today, see you soon!
2021-05-13