Что там с Водородным самолетом
We close the bottle. Look at how hydrogen is poisoned. Friends, Hello everyone! as you can see, this giant long-range hydrogen aircraft is still at my house. I just can't manage to send him on his first hydrogen flight. It is now 7:38 am. But this does not mean that I just woke up.
It often happens that I just haven't slept yet. So, what news is on the agenda. I have 2 main news on the plane.
One of the news is very good, but the other is bad. But more on that later, friends. Now I’ll show you what I made a new one by plane. I got some carbon fiber. Unfortunately, my fiber is tangled.
But luckily guys, I have an unrealistic amount of it, thanks to one of the subscribers. As you might have guessed, I want to make the landing gear. It may even be a chassis based on these bagels. Very light wheels, such nice quilts. For this great work, I even made the simplest matrix.
That is, now we will not just blurt out. We will blurt out on a glossy surface - this time. Then there are bumpers, nothing will come out.
Carbon has the ability to flatten out like this and climb out along the edges. This nuance will not be here. It will be necessary to invest inside here. You can even squeeze out the epoxy to keep everything tight.
You see, it turns out that we are growing, since some semblance of matrices has already gone on the channel. This is very cool! It's great. Now I will cut the carbon a little to size and start molding. It was necessary to cover with wax. The form is disposable, but suddenly it will not stick well from this adhesive tape.
When I blow dry, the epoxy discharges a lot and permeates the fabric very quickly. In principle, everything is ready, guys. Here here it turned out to be much thicker than at the ends. At the ends about 4 mm, maybe 5.
Well, at the root about 8 mm. The chassis will carry a weight of about 13 kg. But only after curing will we understand whether this spring is enough or not.
While the spring is drying - turning work on the canal. We need to carve a couple of small details. These will be the axles for our wheel ducts. The material is very interesting. I do it with a red-hot bolt from a Range Rover. We do not save weight here.
Here the main thing is strength. The axles are somehow thin, only 6 mm. I am afraid that the wheels may fall off if they are made from something that is not particularly durable, from aluminum, for example. I don’t like to make such small details, I also conceived 2 threads each. So it seems to me it will be the best and more powerful and convenient to fasten. All diameters are ready, you can cut and thread. We'll control a little.
The idea is that on this thread, the nut is screwed up to the stop with a lock. And that's all. And so that the wheel does not dangle much and does not pinch it. Let's see how it is. An unbalanced wheel does not spin.
Is that so? Oh, the imbalance is clearly visible. Well, that's okay. The main thing is that it is big. More than 125 rounds. Well, we need 2 threads for attaching the console.
Let's go! Details are ready. These are the beauties that turned out. Moreover, the spring itself is already ready. I pre-processed the spring here.
It is not yet clear about the strength, but it seems to hold some weight. I don't know what this weight is. The springs weigh 446g + 2 wheels = 986g total. So now I will screw everything up and I will have to take my things home, continue to make the plane. I will supply fashionable nuts and washers.
I don’t remember which car it was from, in my opinion from a very fashionable car. I still like it to be more powerful. And here are nuts with locks. First, they will spin until the end. And secondly, the counter, if suddenly somehow it unscrews a little, then the counter will not allow to completely unscrew. It is not always possible to apply such a system. Although we must take it into service. I liked it. What can I say? I am very pleased with today.
I didn't want to make these wheels. The plane can take off anyway. That is, it is a dump cart option. Not really necessary. But it can help in some cases,
when there is an autopilot, firstly, he can somehow steer the wing there himself. And secondly, if there is this cart, he does not need any support at the initial start in the clean and jerk. That is, he himself will stand normally. The wing will not tilt anywhere, will not cling to the ground.
It is for these purposes that these wheels are made. Oh, I almost cracked a tooth, but the highway seems to be working out. Well, I don't know, guys, it seems to me that my strength is more than 15 kg. In this direction, you see, twisting is played a little.
Here, in order to avoid this, it was necessary to reel under 45 more later. Or somehow right away. Immediately - I do not know how to depict all this in the matrix. I reeled before, but then they become unrealistically so hard. They are simply unreal. There is a slight imbalance.
These are the little things in life. The wheels are super. This is what the chassis now looks like. I've already installed them on the plane. This platform is not attached to it in any way and they will have to be free to fall off during the takeoff run. I have already strengthened them once, because they somehow sag strongly. It may still need to be strengthened.
But in principle it holds the load, it should be enough for takeoff. And the plane will land on this little rear wheel. I lift it up, the platform begins to fall away. Here it holds a little and, accordingly, when the pin comes out of engagement there ... I provided the pin there. It also disappears here.
Such a tricky system. How she will behave in work is still unknown. And now it's time for the news.
Let's start with the good news. I installed a flight controller on the plane. He already stands right in it and everything, everything, all the guys are connected. All flight modes are configured. Moreover, the manual mode is set up, exactly as it was before.
So you see how the aileron is now deflected? On the reverse side, the aileron stands straight or even slightly down and this is how it should be in manual mode. That is, it is zero trim. The airplane has some irregularities and with these steering surfaces everything is corrected when trimming, when adjusting the airplane. Similarly, we have built the tail. Notice the elevators point slightly upward.
So they should be in level flight with the very best alignment, which gives the minimum power consumption. Let me remind you that the plane flew in principle at 180 watts. He no longer needed to fly in level flight, and this is in manual mode, it is in control of his hands. I hope, with a microprocessor computer control, using an autopilot, it will fly even with less current and will consume less electricity.
This is exactly how it was conceived, because our hydrogen system has 250 watts at maximum. Well, in the face value it should give out 200W. In order to successfully complete this setup, I had to connect an old equipment, an old receiver. Oh, guys, everything gathered here more than once. And not even 10 times, much more. I had to put everything together and redraw everything, redraw it, after which I connected the plane through the flight controller, which was set to zero. And already all these deviations I brought out mechanically, guys, by lengthening or shortening the rods on the steering surfaces.
It's simple enough, but it took me a day and a half. Along the way, I finished all sorts of nice little things, such as, for example, installing the lights. It's green here. On the other side, as expected, red. It shines very bright over there. I like.
Well, the most important thing and the most difficult for me was that I completely understood INAV. I studied absolutely all the tabs and figured out how what works here and how to configure it. That is, an airplane can be said to be fully tuned in order to make its first flight in manual mode, in stabilization mode, and even in more advanced modes, where the airplane flies by itself, keeps altitude, and keeps a course. Also set up the turning radius, angles, how fast it will turn and much more.
I won't go into much detail here, guys, too much information. All this is on the Internet. On the Internet, I mainly comprehended this. The plane is unlikely to fly ideally well right away. But we have, first of all, a manual mode, where we can fly ourselves the same way as before.
And secondly, I absolutely completely figured out how and what to configure here. This is what is most important to me and the good news is knowledge. I invested in myself. That is no kidding, friends, everything works. See?
All rudders work and deviate. And even if you now brazenly arm him, because the GPS does not catch him, he will not arm himself so easily here. Already, in theory, it should be armed. Oh, that's all, I got armored. Look, he even turns the gas already. Everything works. The aircraft is ready for launches.
You have no idea how many adjustments had to be made. In this position, I set up the location of the flight controller. Note how it is installed here. In general, I calculated it so that in the horizontal position the flight controller would occupy a zero position and did not try to deflect the plane anywhere from the very beginning. That is, for the initial flight to be more or less normal for the flyer in automatic modes. That is, when we make
some kind of small airplane, we twirl it. We do whatever we want. We succeed in everything quickly. But this is a colossus, you can't carry it back and forth.
And in order to tune, you literally have to collect everything, so that everything is assembled and so that you can somehow navigate and start rehearsing everything here. While the wing is raised, I will show you how everything in this compartment is arranged here. Look, the speed controller is attached in this way. I glued it to the side, from the bottom of the platform, so that it would not fall off from long flights from vibration. I also attached it to silicone glue.
These scary pieces of paper have very clear functionality. See, it says S5. I know where to plug it in on the flyer. Because the wing is removable and in this size the wing will not go anywhere. The wing is five meters long. I haven't connected the flaps yet. Although it is already possible to do this.
I brought out the necessary ports, the necessary connectors. That is, there is everything for this, only you will need to configure it programmatically. The receiver is located in the depth of the aircraft. Here it is now lit in red, because it is not yet connected at the moment.
But as soon as you click the equipment and the green light came on. This indicates that the receiver is working. I placed it at the bottom of the wing and placed the antenna vertically for better reception. Video antenna from below.
I use a 5.8 GHz transmitter with a power of up to 3 watts. I did not use a long-range HPL, but that is 1.2 gigahertz, because 5.8 is corny more convenient. No repeaters needed. The plane should in fact fly point by point and should be controlled by itself.
That is, to fly by itself. The airspeed sensor is positioned like this. The sensor looks a little upward, I think this will not greatly affect, but it is, as it were, a little further from the fuselage. The boundary layer will have less influence on the readings. We have a fpv camera here. Set up OSD very well. All parameters will be shown. By the way, I put the watts in the middle.
This is the most important characteristic for us. The camera is very far from the flight controller, so I shielded these wires. Increased the hatch cover. Here I made it easier, chose polystyrene,
cut everything out. The lid is now much larger so that you can fill the hydrogen cylinder. There is already such a bed under hydrogen, very light.
Well, like that, guys, I shielded the wires. See, in copper tape. The GPS is located right here. That is, nothing should interfere with him. I also completely tuned the equipment. Here we have arming, that is, turning on and off the entire system. Here we have flight modes.
Naturally, at this point we have a manual, that is, absolutely manual control with the same costs, with all the same settings, as I said earlier. Here we have an English mode. The plane will have to fly in the horizon. I adjusted very small roll angles and up and down angles to conserve electricity, because the aircraft is still long-range and will have little thrust. Here we have a cruise mode. In this mode, he will fly himself, maintain the altitude and direction of flight.
I have not adjusted the flight mode by points yet. I'll set everything up, I've already figured it out. There is nothing complicated there. From this side, the circle flight is included and the return home. That's all. There is also a switch for various OSD settings.
I even had to write down one more scribble in order to remember all these modes. You see? Since I have the first such plane, I still cannot remember everything at once. And in the future, if it is convenient, I will use these settings. This is where the good news actually ends. Do you know why friends? Because our hydrogen engine stopped working.
I already called Dima, told him about this interesting news. He (the engine) has degraded. I don't know why yet. Maybe I set it on a little, but the bottom line is that it continues to degrade. Perhaps oxygen got into the cylinder or some other gas got into when refueling.
There may have been oil in the gearbox. Unfortunately, I did not clean it, rinse it and degrease it before. I do not know in connection with what and why.
I didn't think to do it. And the hydrogen fuel cell, guys, really hate such gags and it has degraded three times already. That is, instead of the desired 200 W we need, it now gives out 60-80 W no more. Here is such a pain, sadness and longing and nothing can be done about it, as I see it. I'll send it to Dima.
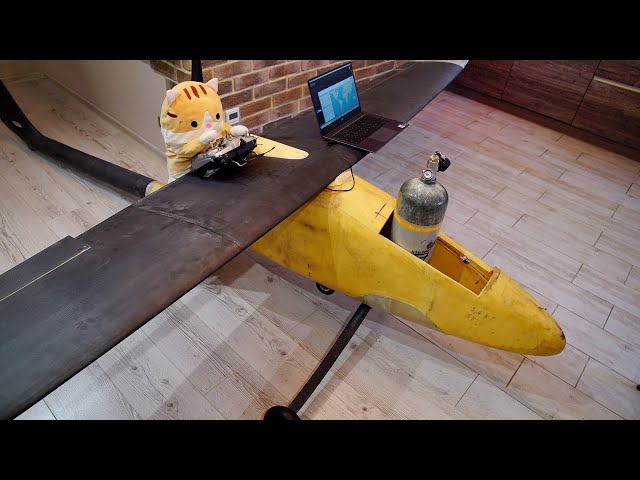
It has pure hydrogen in a big tank. Dima will try to test it again. What if it works? Well, it doesn’t work for me, and now I’ll demonstrate it to you. It took me about 12 hours to test this entire system. It wasn't overnight. You can imagine how I hummed for a long time here in the apartment with this hydrogen.
At first it was scary, then I got used to it. Look, guys, the system is essentially ready for installation in an airplane, only it has a small power - much lower than the calculated one. It turned out that the valve was undermining. That is, a new valve is needed. When closed, it still allows it to pass. And when it opens up often, it plays off too much. So I narrowed the hole.
I also lightened this hydrogen cell by removing the steel bolts here. But I did not touch the functionality at all. You can even see that I did not touch these bolts. The only thing, with these reducers, that is, this is already the second reducer, the first did not work at all, because it gave a little pressure. He needed five times more. Okay, enough rant, turn on the hydrogen and see how it works.
I opened the balloon, everything buzzed. At idle, 14.8v is pretty low. Rises slightly. It rises first, then starts to decrease. A tricky system here, it is still working extremely unstable. Let's give the load. As a load, there will be charging,
we will charge the battery. Here you can adjust the load. You see, it began to drop to 7:00 volts. 10 volts, 60 ... 70 watts and that's it. That is, 70W did not even pull. Here are the things. Reduced the current, now it seems to be working.
These are the parameters. These parameters are close to the maximum. 70 watts and current at 12 volts roughly 5.7 amps. About 6 amperes dancing. And the voltage should be much higher with such small watts. Something happened to this system. What do not you understand.
But back, it seems to me, she will not return. Look, I worked a little, it seems like the volts are already jumping up to 12:00. Here the valve also opens, it also haws 1 ampere. See? You can, in theory, slightly raise the load. Well, this is also not for long, but at any moment it may start to work worse. I've already checked. That is, it works, works, if it is at the limit,
then the bang and stopped working. But look at how hydrogen is poisoned. Now the valve does not allow, but nevertheless ... You see, this is how it poisons. That is, the valve does not close completely. But it doesn't matter if you think it does.
No. You can shut it up. I shut up. Nothing happens. You see? Sometimes he starts to take off like this. That is, as if everything is turned off and he plows idle. But nevertheless, the battery charging does not have time to turn off for some reason.
So we close the balloon. The balloon is closed. As you can see, it continues to work. But this is not for long. It'll all be over soon. It's over. All the gas in the hoses came out, everything stopped working. Here are the things, guys.
Our plane will not fly on hydrogen this time either. Unfortunately, such a thing is not so easy to buy. And we seem to need more powerful, because 200 watts is not enough. I would like 400 watts. Let it fly 200, and 400 - this will be the very reserve that is needed for maneuvers, to go up sharply there at an angle, so as not to fall, not to fall and not to lose speed, in order to somehow maneuver need a stock. And so that you understand,
even this box ... Dima bought it for $ 3,000, plus a balloon. Well, that is, everything is not very budgetary. Now the whole thing has dropped a little. But all the same, a 400-watt cell, as I suspect, will cost 400,000 rubles ($ 5,400), because this one costs about 200,000 now. But that's all for me.
Who was interested - subscribe to the channel, support with like! Until then, and see you again. I will send the hydrogen engine to Dmitry in the suburbs. He will still try to test it on his pure hydrogen, but we'll see. The project is not closed, guys, by no means.
The project will continue.
2021-11-25