В РЕМОНТЕ ноутбуков важна любая мелочь Кз и нет изображения - типовая неисправность ноутбуков
there are no small things in laptop repair I welcome you to the Laptopia channel My name is Ekaterina and I repair laptops Today I will have a couple of laptops for repair And if with the first everything is very clear Short circuit on B+, then with the second everything is not so simple But first things first I found a crack on the pallet I wonder how it got there but I can guess I disconnect the battery and start disassembling the laptop Unscrew the screws and don’t forget to unscrew the hidden ones under these rubber bands The screws are unscrewed I'm disassembling the laptop I can't carefully remove the tray further because one screw turns right on the side of the crack Coincidence I don't think so In several approaches I still managed to unscrew it The laptop tray has been removed and I can already see the cooler that doesn't want to stay in place And yes, the hinge fastenings also seem to be broken The scale of the damage on your screen The broken hinge fastenings will need to be restored There's not much work here, but it's not worth leaving like that Well, what do we see here? Of course, there’s something wrong with the radiator. But I didn’t find any traces of flooding or mechanical damage. A little bit of dust, but that doesn’t count. Once again I carefully inspect the board. And since I don’t find anything, I suggest making several measurements. In the resistance measurement mode, one probe to the ground, the other to the first
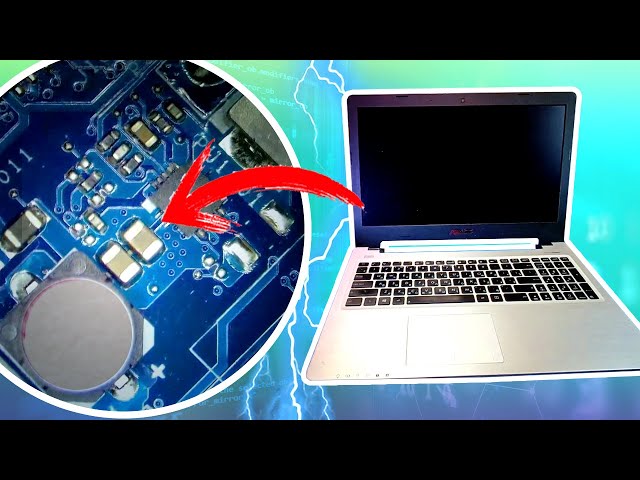
PV+ connector that comes across. Not a short circuit, of course, but very close. It would be good to check the first output mosfet. Very often they fail with a short circuit of 19 V. But now it’s intact, you can say lucky I suggest looking under the microscope By the way, the board we have is LA E791P and we go in search of most likely ceramics. We are looking for any anomaly. In most cases, a faulty capacitor is visible. I carefully inspect the board. What are we looking for? Scratches, chips, cracks, darkening
Well, everything that the eye clings to And you know, I think I noticed something Some kind of strange soldering on this capacitor It’s as if the solder has become porous You can see it with your eyes through the microscope, but the camera doesn’t really want to transmit I’ll try to bring it closer You see it And here is the crack It’s visible And if you change the viewing angle And now you’ve seen Like if you’ve seen And again I’m moving on to the solder This is clearly not the norm If you have an idea why it’s like this, write in the comments The adjacent capacitor also has some porosity, but to a lesser extent For comparison, this is what the solder looks like on another capacitor And it looks absolutely normal Or here are a few more capacitors But I suggest returning to our suspected capacitor The best way to make sure that it’s the problem is - This is to unsolder it, which is what I propose to do. Add a drop of flux and solder with two soldering irons. Everything as you like. Remove the faulty capacitor from the motherboard. Remove, remove, dismantle. Check whether the short circuit has gone away. The resistance has returned to normal.
You can start restoring the hinge fastenings. Using Kafuter and black ink, start the restoration. The proportion is one to one. Stir
Kafuter. Add this mixture until it hardens. broken mount I'm putting the bonnets in place But in this case, you can help with a hot soldering iron And you're still using soda and superglue I increase the height of the stand and it's almost [music] ready Tighten the hinges Perfect It's time to turn on the laptop And an unpleasant moment It looks like the matrix is faulty Yes, here at the bottom there is a black smudge The matrix is clearly broken I throw in a known working matrix And the laptop makes me happy with the picture It seems it's time to move on to repairing a second laptop And the second laptop is an Asus K56 Oh, my old favorite The laptop is a little disassembled The screws are in the bag but it seems that not all of them The speakers are also lying separately Hmm In general, the laptop is declared as working without an image But working laptops are not carried or carried for repair If this happened to you, write your story in the comments Most often, these devices do not have an image due to the grinding of the matrix But first, let’s make sure that the laptop does not show an image and that it is not working at all starts I suggest connecting it to a laboratory technician and watching Looked The matrix shows a black screen with backlight The laptop reacts to the capslock with an initialization tester Let's make sure that the laptop is working Yes the tester beeped The laptop starts but does not show a picture on the matrix By the way, there are no screws on the matrix frame We should look maybe at the matrix not connected Let's disassemble the screen This will be easy to do since the frame comes off and is difficult to hold on. It feels like it is held in place by only one latch. Now I'll hook it up and that's it. I'm removing the frame
[music] of the matrix. Hot-melt adhesive Seriously Hot-melt adhesive [music] glue [music] Okay The matrix is held on by two screws from the top And this is so from the factory From below it is glued with tape, although there is room for two more screws So the cable of the matrix was inserted but was obviously already removed Just in case, it was reconnected So, here are traces of liquid Hmm I’ll screw in the appropriate screws Let’s try to turn on the laptop again Someone will remove this hot melt glue Apparently I Yes, screws are certainly in short supply Alas, nothing has changed So I don’t know whether the camera is visible or not, but the backlight and the dark screen The backlight and the dark screen At the same time, the caps reacts to the caps Well, in principle, there is an inclusion Pu-pu-pu Actually, of course, at all this is the matrix cable on this board that often fails But I suggest you look at the condition of the motherboard I’m confused by the traces of liquid on the matrix One screw holds the tray Throw it away And what do we have with the board Some traces The capacitor is gnawed a little bit eaten up So wait a minute Why are there two screws in total There’s no And here too it’s missing Probably it’s worth disassembling completely And it seems to be a typical problem for this model Asus K56CB No images on matrix We are changing the matrix cable But there is also hot glue on the lid and traces of spillage and they have clearly climbed into the laptop but have not done it It’s not clear yet, but it’s very interesting Suspiciously clean and the new cooler is clearly not original Well [music] interesting We have a new cooler And also, as far as I know, the battery is not working I don’t know, it’s not a native one, it looks like it was replaced So I continue to disassemble the device I unscrew all the screws I’ll need to look at the back side of the board I remove the Wi-Fi module And the protective film does not hold I unfasten everything that is unnecessary Oh yes, the board is flooded And you can see from the stickers and from the marks on the [music] dress I don’t know what they are flooded with but something dark I won’t try But not that much Here the only thing here is also this moment Well, somehow everything is very superficial It can’t help but be because of this [music] pictures [music] Strange Hmm I’d like to look at the connectors So The film is basically normal What else do we have standing here ? Ha, the cable is burned out Well, you can clearly see that it ’s burned out. Well, here it is, the path is burnt out. Here’s another one. I think what’s visible here. These are traces of liquid. So I’m removing the cooling system and inspecting the board again. We need to look under the films under the chips and into the connectors.
First, I’ll wash the motherboard with glass cleaner. Mister Muscle is perfect for this. My husband’s toothbrush and lint-free brushes. I clean the board with rags I remove traces of liquid I touched the keyboard connector but it’s not scary I’ll put the clamp in place And let’s move under the microscope for the bike It looks like we’ve found the first candidate for replacement The resistor is clearly rotten In any case, one of its terminals Yes, yes, this one I add a little flux I use Erca flux and solder this section I dismantle this resistor and solder it with one terminal Like this I measure using a multimeter resistance Didn't work I'll scratch it a little with a scalpel I'll try again Excellent I change the resistor I wash off the used Fluxoff flux Excellent Let's move on And here is another candidate for replacement One pin has become quite dark There are also traces of liquid It looks like something sweet It's better to wash it with warm water In the meantime I'm changing the resistor There is also something left near the codec And I also wash it with warm water Another capacitor but it will be enough solder Done We wash off the remaining flux and return to the desktop. Perhaps I have a similar inter-board cable, but it is not intact. A good reason to show the option of restoring the cable or cable. So, I prepare for replanting the tracks. We found a donor. I clean a couple of tracks and cut them off. I desolder them with a hot soldering iron.
I have a 350° soldering iron. I carefully tin the edge. Here I apply solder paste B. At this point I lowered the temperature of the soldering iron to 280° I carefully solder [music] I position I fix it with thermal tape That’s how it’ll be great Just grab it I carefully hold the track With the tip of a soldering iron I solder the track It looks good I definitely wash FluxOff and position the second I also fix it with thermal tape I fix it on both sides, top and bottom And I’ll carefully solder it like the first one Like this I’ll add solder paste if necessary Yes, like this detailed video on restoration You never know when it will come in handy Of course, you can find it specifically for this laptop from the analysis And, in principle, there are a lot of universal grinds, but the technology itself, as they say, is better to know So here it’s already restored, all that remains is to fix it I fix it with a mask that dries in ultraviolet light Tide for my taste and the color is the most suitable for these cases I do it in two or three stages and cut off all unnecessary Video We won’t delay this Here is the result I suggest assembling the laptop In this case, as it was the cable is restored, it’s better to connect this part to an additional payment because less people will pull it out. Move on to the matrix cover [music] [music] Also, the speaker is not from this laptop. Well, at least there is a donor [music] What kind of crap am I [music] doing? Well, you get a higher education and then hot melt adhesive [music] clean it. I won’t repair the laptop
of the chamber. It will be interesting, I think. This is exactly the case when eliminating the defect took less time than assembling and disassembling and bringing the laptop into decent condition Yes, this also happens. So let's connect the test SSD right away [music] [music] Turn on the laptop and wait for the picture The picture didn't take long to arrive and we still need to run a few more tests before handing over this device. Although it would seem a typical problem is the matrix cable. I hope you liked the video and I'm waiting for your comments to read and answer everyone if possible [music] Hello. I can't talk right now. Busy. Well, how about what? I'm repairing
2025-04-10